Last year we ran an open competition, inviting staff and students of the School of Chemistry at Bristol to contribute blog posts. Our competition winners, Bristol undergraduate chemistry students Ana McGuinness and Charles O’Brien, have agreed to give you the low-down on their first experience of preparing a blog post for Picture It… Chemistry.
 Step 1: find a partner
All blog posts released on Picture It… Chemistry have involved at least 2 people, and often more than that. This rule came about so contributors could share and refine their ideas (and keep each other in check, at times), and such collaborations have taken a number of different forms in the past, ranging from writer and photographer working almost independently after agreeing on a topic, to teams of contributors sharing all activities (research, writing, photography, image composition).
When Charles was looking for something to do over the summer and heard about the competition, he worried that it might be difficult to find somebody to work with, but decided to discuss this with some of his fellow students before enlisting the help of editors Natalie and Jenny. He soon found somebody who shared his interest among the regulars at Bristol’s “Big Ideas in Science” course and started discussing possible topics for a blog post with Ana, a student from his year.
Step 2: select and research your topic
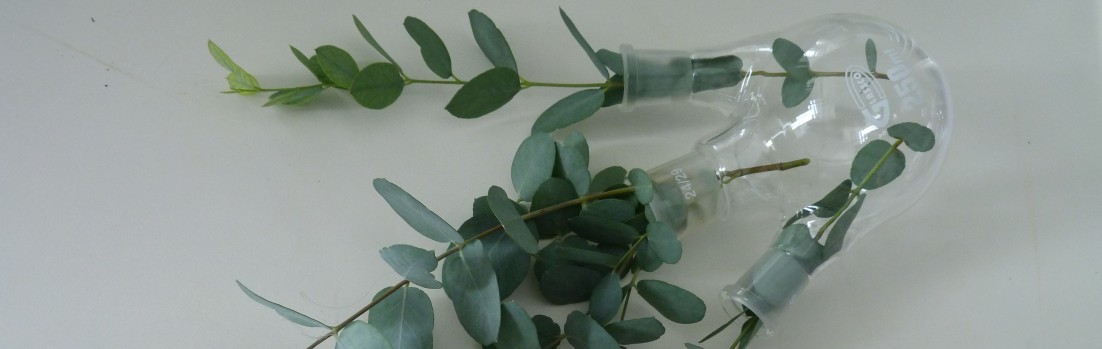
Ana and Charles considered many topics, including some of the material covered in one of the first year “Bootcamp” experiments (2 weeks of intensive laboratory training which takes place after the first year exams). When they had taken some trial pictures of the extraction of plant waxes, they changed their minds, deciding to pursue the link between food and chemistry in greater detail instead. Many cups of coffee later they settled on sugar as a topic, since they had relied on it as a key motivational ingredient in cakes and biscuits consumed during report writing and revision. According to Ana, the main appeal was that this would allow them to “experiment” in her kitchen, and try out many delicious “reaction products” in the name of research.
Putting off literature searches in favour of experiments, caramelisation was soon attempted, but initial studies only gave little pools of molten sugar, which quickly went black. 2 kg of sugar and several hours later, most of Ana’s pans were covered in sticky, sugary mess which did not look photogenic at all, although the addition of sodium bicarbonate briefly caused excitement.
The initial forays into the literature were equally unsatisfactory, as Charles said: “I thought heating sugar was a simple process, whereas we found hundreds of articles about the underlying chemistry, crossing over into other areas of science, such as nanotubes, biofuels and phase transitions in physics.” Eventually, though, both say that they stopped feeling daunted by the number of relevant papers and became immersed in the literature, starting to enjoy seeing the connections between different topics and different subject areas. They soon found themselves in the Physics library, and Ana describes their adventures: “Going to the physics library made us realise how chemistry and physics are so intertwined that it becomes truly impossible to constrain ideas within one subject area. Also, we saw how physics is ubiquitous for the understanding of all the chemistry we have been taught so far. It is easy to get lost and fascinated by new material and ideas, but the journey is worthwhile.”
Finding research publications by some of the academic staff they only knew from lectures provided another highlight. In their breaks from hard reading of the relevant literature sources on sugar and caramelisation, Ana and Charles also broadened their experimentation with new recipes, all in the name of research, of course. In their own words: “A very important element in our collaboration is the passion for good food; from cooking it to eating it. The chemical reactions happening in a kitchen are extremely complicated and not very well understood. How an ingredient changes depending on the cooking methods and the conditions – just like in the labs. For example, we cooked a lamb curry on one occasion in a pressure cooker and compared the flavour of the same recipe that had been slow-cooked in the oven. The pressure cooker became a kitchen essential worth praising as the spices cooked properly, there was no bitterness and we could eat the curry in 45 minutes as opposed to 3.5 hours! Some physical chemistry on gases and pressures must have been the key to this outstanding result.”
Step 3: draft blog post
With so much information, selecting what to actually write about became vital, and here the second rule of the Picture It… Chemistry blog was meant to help:
Each post has three sections, consisting of:
1. Introduction, explaining the picture and why it is interesting. (Largely free of chemistry.)
2. Scientific background. (A little bit of chemistry, but quite basic.)
3. Details for chemists, such as the synthetic route used to make some of the compounds. (If you call yourself a chemist, this one’s for you.)
While they felt confident about the introductory section, and had found quite a lot of interesting material for chemists in section 3, pitching the scientific background at the right level was challenging and here they worked a lot with Natalie during the editing process.
Another big challenge was to accommodate all the interesting things Ana and Charles had found in a reasonably short blog post. As Charles put it: “In that respect, the skill of knowing what to leave out became as important, if not more so, than what to include. Everything we looked at seemed to be connected to chemistry in some way (no exaggeration) and was invariably underpinned by some aspect of thermodynamics… I think we learned the hard way that conciseness is key but we got a lot of useful things out of the writing process. It has certainly helped my approach to preparing lab reports, even if it’s a slightly different skill.” Eventually they agreed with Natalie that this might best be done by actually using the material in two posts, the first one with greater focus on sucrose, whereas the second one covered sugars more generally.
Step 4: create images
Apart from sourcing photos of sugar cane from Mexico and undertaking important field work in the Bath Sweet Shop, Ana and Charles also spent some time in the Bristol’s teaching laboratory to compose and take pictures of the right kind of image. They found it difficult to make molten, caramelised sugar look interesting, and the use of a watch glass and petri dish together with antique coffee cups gave the appearance of an overly enhanced image (see below), so more work was needed. In addition, the hot sugar was difficult to work with and set quickly, producing masses of washing up.

Round bottomed flask containing sucrose and golden syrup mixture with HMF molecule. Sugar bowl with ball and stick sucrose model
Having just tried out some computational chemistry in the Bootcamp, they were keen to find out more about the molecular modelling approaches used to generate structures. To this end, they spent several hours with Natalie to learn about computational modelling approaches and how to find low-energy conformers. They were really impressed with the use of computational tools in modern chemistry and Ana stresses: “As science gets more advanced and complicated, it becomes more and more challenging to understand chemical and physical phenomena without being able to visualise and compare structures and explore reactions. For this blog post, we were able to make use of such important resources at an early stage of our studies, and I found that very interesting, important and fun. Charles will probably agree with me as he has used computational modelling for his recent lab reports.” <Here Charles nods…>
The final modelling step was to try out different ways of displaying molecular structures. Although they liked the colours used by default in different modelling packages, matching them to the colours of sweets so the molecules would look like another tasty treat gave the most appealing results, as we hope you agree…

Sweets in a large test tube, together with a molecule of HMF.
Step 5a: win competition (not always required)
With so much material (and so much cake), both Ana and Charles agree that it actually helped to have a deadline, forcing them to finalise their selection and complete the writing process.
Step 5b: work with editor and see your post published
As suggested throughout this and the Making of… posts, working with an editor, usually Jenny or Natalie, to polish and finalise posts is a key part of the process, and quite often blog posts change and evolve further during these discussions. This was certainly the case for Ana and Charles, prompting them to review images, add references, clarify minor points and work with Natalie to turn surplus material into a second post. Once all was done, both declared themselves very pleased with the result, as well as the linked article in our Chemistry Explored magazine, so watch this space for more posts in the future…
Contributors: Ana McGuinness, Charles O’Brien, Natalie Fey
